Here is the following easy tutorial on how to make these great flowers that you can use on any of your creations such as Handbags, Totes, Wallets etc. And even on your scrapbook pages and cards! So dig into your scrap bin and have fun!
Here are the supplies you need:

Scrap pieces of Fabric
Iron
Needle and Thread
Ruler
Scissors
Buttons
Instructions:
Step 1: Cut your fabric into 5 - 2" x 2" squares.


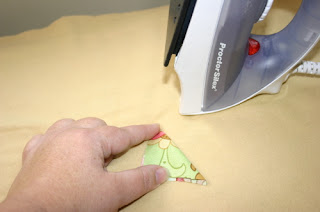
Step 2: Fold each square into triangle pieces and iron.
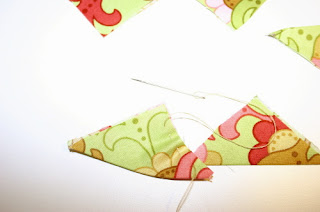
Step 3: Thread your needle with enough thread to go through all your pieces. Sewing with a very loose stitch weave your needle through the two raw edges.
Pull the thread tight creating a petal and continuing onto the next 4 petals doing the same.
 Step 4: When you have finished all 5 petals, sew the two end petals together creating the flower.
Step 5: Flip the flower over and sew on your button making sure to catch any loose fabric and making sure to catch a piece of each petal from underneath making sure of a even center of the button.

And whaa laa! There you have it..a cute little fabric flower to use on your layouts, cards or on mini albums. You can create these flowers any size from adjusting the squares you cut out from the fabric..just as long as you keep the measurements square you can use 1" x 1", 2" x 2", 4" x 4" etc....
Here is a sample of one I used on a tote that I created.